Hot Melt Edge Banding can hide raw plywood or MDF edges and create a clean, durable, and polished finish.
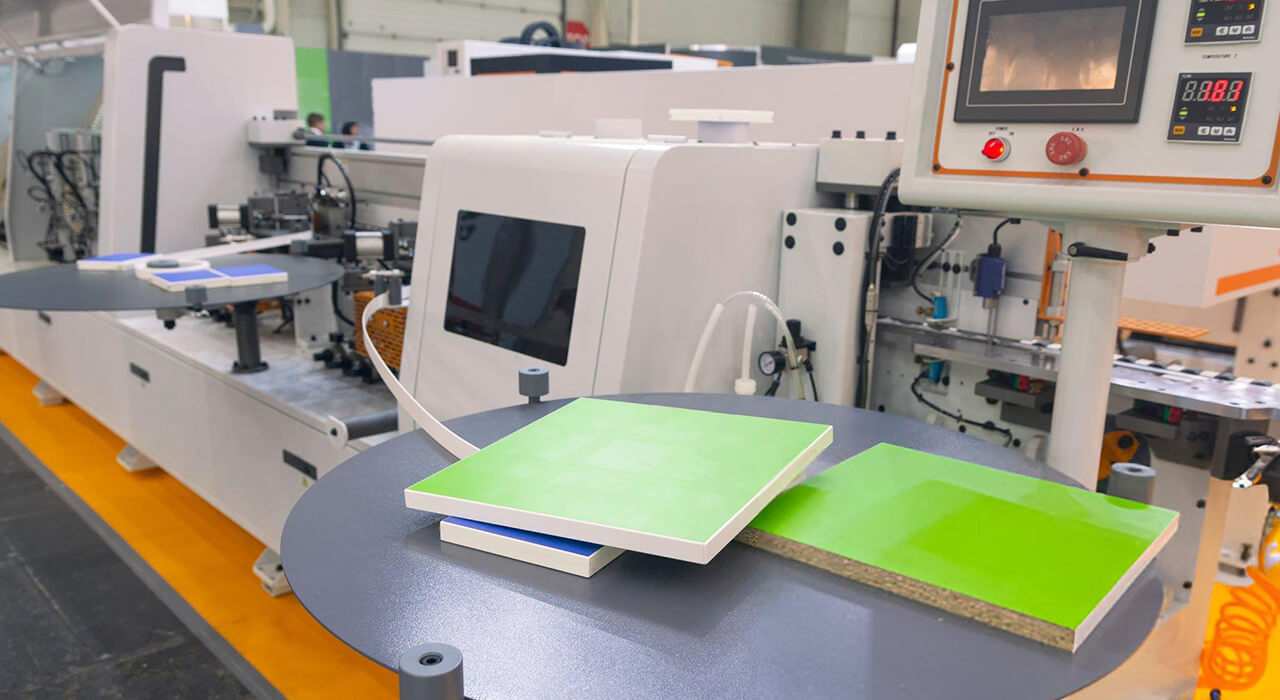
By edge banding with hot melt glue, your cabinets and furniture gain strength and style. In modern production, Automated Edge Banding Machines apply these glues in one rapid step. The result is an edge that looks as solid as solid wood and stands up to moisture, wear, and impact
In this guide, we dive deep into hot melt edge banding.
Featured Resource
Table of Contents
1. What Is Hot Melt Edge Banding?

Hot melt edge banding is a two-part solution: a narrow banding strip and a heat-activated glue on one side.
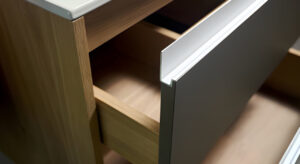
The banding strip can be wood veneer, PVC, ABS or acrylic, and one side is coated with a hot-melt adhesive. When heated, the glue melts and adheres to the wood panel’s edge. Once cooled, the strip bonds tightly to the panel. Edge banding covers exposed plywood or MDF edges, making pieces look like solid wood.
Edge Banding is used on edges of cabinet doors, shelves, countertops, and furniture parts. It protects exposed edges from chipping, moisture and dirt. Without edge banding, manufactured wood panels would absorb humidity and swell or crack over time. Edge banding also boosts aesthetics: a smooth, color-matched banding strip creates a high-end, seamless look on any piece. Today’s automated edge banders feed panels, apply glue, press banding, and trim edges in one pass.
2. Benefits and Applications?

Hot melt edge banding offers numerous benefits for professionals. It instantly covers rough edges, protecting them from damage and moisture. Aesthetically, edge banding provides a finished, premium look that customers expect in cabinets and furniture. In high-use areas like kitchens and offices, banded edges resist chipping and wear far better than unprotected edges.
Other key advantages include:
-
Durability: Edge-banded panels stay strong. The strip and glue protect the edge from impacts and keep moisture out. Moisture can cause plywood edges to swell or delaminate; edge banding seals out water to prevent this damage.
-
Cost-effectiveness: Using edge banding lets manufacturers use cheaper core materials (particle board, MDF) without sacrificing appearance. You get the look of solid wood with less expense.
-
Productivity: Applying hot melt banding is fast. Automated machines can band thousands of feet per hour, and manual methods like an iron-on strip are quick for small jobs. This saves time over painting or veneer gluing.
-
Versatility: Hot melt banding works on many substrates and edges. You can bond wood veneer, PVC or ABS bands to plywood, MDF, or particle board. It even works on curved surfaces if you use flexible strips or heat to bend them.
Applications of hot melt edge banding span every furniture and cabinetry sector. Common uses include:

Cabinetry: Kitchen cabinets, bathroom vanities, and cabinet doors routinely use hot melt banding. It makes flat-core panels look luxurious and protects them in humid kitchens.
-
Office Furniture: Desks, conference tables and shelving systems use edge banding for a sleek finish and long-lasting edges in commercial use.
-
Retail Fixtures: Display shelves, counters, and store fixtures benefit from banding’s clean look and protection.
-
Home Furniture: Bookcases, desks, entertainment centers and other furniture often rely on edge banding for a polished look.
In all these cases, hot melt edge banding adds value. It makes furniture more durable and visually appealing.
3. Types of Hot Melt Adhesives: EVA vs PUR
Choosing the right adhesive is critical. In hot melt edge banding, the two most common adhesives are EVA (Ethylene-Vinyl Acetate) and PUR (Polyurethane Reactive). Each has distinct properties that suit different needs. Understanding their differences helps you get the best bond for your projects
3.1. EVA Hot-Melt Adhesive

EVA is the traditional workhorse of edge banding. It’s a thermoplastic glue that melts at moderately high temperature and solidifies on cooling.
EVA offers a fast bonding time, meaning edges adhere almost immediately after cooling. This is great for high-speed production. EVA glues are also forgiving to work with – once applied, you can trim or adjust the banding easily. They generally have good color clarity, so glue lines remain neat.
Characteristics: EVA typically melts around 150–180 °C, and forms a strong bond quickly. It works well on wood, plywood and basic laminates. However, EVA is not highly moisture or heat resistant. It will soften if temperatures exceed about 80 °C, so EVA-bonded edges are best for indoor, moderate environments.
3.2. PUR Hot-Melt Adhesive

PUR adhesives are a newer, reactive hot melt that cures chemically after application.
PUR melts at similar temperatures (around 120–150 °C), but unlike EVA, it cures into an incredibly strong bond by absorbing moisture in the air. Over the next 24–72 hours, the bond grows stronger.
Characteristics: PUR glues are known for extreme durability and resistance. They yield a virtually invisible glue line (“zero bondline”) and hold up to high heat, humidity and chemicals. That makes PUR ideal for high-end furniture, kitchen and bath components, or any application needing the strongest, most permanent bond.
PUR also has a longer open time, which means you have more seconds to align the banding before it sets. On the flip side, once cured, PUR is harder to trim and requires specialized equipment (and careful moisture control) for best results.
3.3. Polyolefin (PO) Hot-Melt Adhesives
A third class worth mentioning is polyolefin-based adhesives. PO hot melts bridge the gap between EVA and PUR. They offer better heat and moisture resistance than EVA and often better clarity than PUR.
PO glues still require heat to melt but do not cure chemically like PUR. They are growing in popularity as a mid-range option for woodwork applications where some extra durability is needed without the full cost of PUR.
3.4. EVA VS PUR
The table below compares key features of EVA and PUR adhesives:
|
Property |
EVA Adhesive |
PUR Adhesives |
|
Activation Temperature |
~150–180 °C |
~120–150 °C |
|
Bonding Time |
Fast (bonds as it cools) |
Longer (cures over 24–72h) |
|
Open Time |
Short |
Long (more time to position) |
|
Bond Strength |
Strong |
Extremely strong, permanent |
|
Heat Resistance |
Moderate (softens above ~80°C) |
High (stable at high temps) |
|
Water Resistance |
Low (not waterproof) |
Excellent (moisture cures) |
|
Workability (Trimming) |
Easy (forgiving, easy to trim) |
Less forgiving (harder to trim when cured) |
|
Glue Line Appearance |
Visible (may yellow over time) |
Nearly invisible (“zero bondline”) |
|
Cost and Equipment |
Lower cost, standard applicator |
Higher cost, needs moisture control equipment |
Both EVA and PUR can provide very strong, reliable bonds. The choice depends on your project requirements. For everyday furniture and rapid production, EVA edge banding glue delivers dependable results at low cost. For high-performance needs – like humid environments or premium cabinets – PUR glue is often worth the extra care.
Regardless of adhesive, always use the correct application temperature and pressure for best bonding. Matching the adhesive to your end-use ensures edges stay intact through years of service.
4. Step-by-Step Application Guide
Applying hot melt edge banding is straightforward once you have the right setup. Below is a step-by-step guide covering both manual and machine-assisted methods. Follow these best practices to achieve a tight, seamless bond every time.
- Prepare the Surface. Ensure the panel edge is clean, square and free of dust or debris. Any contaminants can weaken the glue bond. If the edge board is dusty or oily, wipe it down or use a primer if bonding difficult plastics. Allow the edge and panel surface to dry completely before banding.
- Cut the Edgeband Strip. Measure the length of the panel edge and cut the banding strip approximately ½ inch longer than needed. This extra overhang will be trimmed off after bonding. Use a sharp shear or scissors to get a clean cut at 90°. Handling veneer banding carefully prevents splinters.
-
Preheat the Glue. For manual application (with an iron or handheld edgebander), set your hot source to the correct temperature. For EVA, aim for 380–400 °F (approx. 195–205 °C). Many irons have a “Cotton” or highest setting that works well. Ensure the iron’s soleplate is clean. If using a hot air gun or edgebander, preheat the glue pot or nozzle to the recommended setting (typically 200–210 °C for EVA).
Tip: Check the manufacturer’s recommendation for your banding tape. Some high-performance adhesives or thick banding may require slightly higher heat.
- Position the Banding. Place the prepared banding strip against the panel edge, align it flush on the finished (face) side, and allow the excess to hang over the opposite side. Holding the banding tight on the face side prevents gaps on the visible surface. Ensure it’s straight and covering the entire length of the edge.
-
Heat and Apply Glue. With the banding in place, apply heat to activate the glue:
-
Manual Iron-On Method: Press the hot iron firmly against the banding at one end. Use a “spot pressing” technique by holding the iron in place for about 20 seconds to soften the glue. The goal is to heat the adhesive layer until it flows. After heating, quickly move the iron along the strip while applying downward pressure. Slide the iron along the length of the board slowly to heat the entire joint. The banding should start to bond as it cools.
-
Machine Method: If using an edgebanding machine, feed the panel while the machine applies the hot melt adhesive (from a glue pot or applicator) and presses the tape onto the edge in one go. Modern machines control temperature, speed and pressure automatically.
-
Press and Seal. Immediately after heating, apply firm pressure to bond the banding. For the iron method, use a scrap wood block or roller:
“Using your block of scrap wood, firmly press the edgebanding onto the plywood… Press firmly and slide the block back and forth… ensuring the veneer fully adheres.” Edge Banding USA.
This pressing ensures the strip contacts the entire edge and the glue distributes evenly. For a machine, pressure rollers will press the banding continuously.
-
Hold for a Moment. Keep the pressure on the heated strip for several seconds so the glue cools slightly under compression. Do not yank away the press too soon; allow the bond to set. A strong bond will prevent pulling the banding off once cooled.
-
Repeat as Needed. Move the iron or pressure block and repeat the heating/pressing in overlapping sections until the full edge is covered with banding. Always maintain consistent speed and pressure.
-
Trim and Finish. After the glue has fully cooled (a few minutes), remove any excess banding. Using a trim tool or a sharp chisel, trim the overhangs flush with the panel face. File or sand the edges smooth at roughly a 90° angle. Take care to keep the file clean of glue chips. The final edge should be seamless – ready for staining or painting.
Throughout the process, key factors are temperature, pressure and speed. Too cool or too fast, and the glue won’t flow; too hot or slow, and the strip or substrate can burn.
Always test settings on scrap material first. Use clamps or rollers if needed to hold the tape tight while pressing. If using PUR glue, follow the machine maker’s guidelines exactly, as PUR will require slightly different handling (including moisture in the hot melt reservoir).
Remember, safety first: Always use heat-resistant gloves and keep fingers clear of hot tools and glue. Work in a ventilated area, especially with PUR adhesives, and unplug irons when not in use. With care and practice, your edges will be perfectly banded and durable.
5. Common Mistakes and Troubleshooting
Even seasoned professionals run into edge banding issues. The good news: most problems have simple fixes. Here are common mistakes and how to troubleshoot them:
5.1. Poor Adhesion (Banding Peeling Off)

- Solution: Raise the glue temperature (e.g. use a hotter iron setting or longer dwell time) and ensure even, firm pressure across the joint. Another cause is insufficient surface preparation: dust, oil or no primer can prevent bonding. Clean edges thoroughly and prime non-porous tapes (like PVC) before gluing.
5.2. Unprimed or Skipped Primer
- Mistake: trying to hot-glue directly to untreated PVC.
- Fix: Use a PVC primer or switch to banding with factory priming.
5.3. Glue Smearing or Bulging

5.4. Chipping or Splintering

5.5. Bonding Inconsistencies
5.6. Overheating or Burning
5.7. Glue Hardening in Tip (for PUR)
When using PUR, be careful that moisture in the tube or nozzle doesn’t clog. Keep applicators clean, and if a nozzle plugs, warm it or replace it. This is more an equipment issue but is critical for a smooth process.
For any issue, patience and testing pay off. Check the glue instructions for the right temperature range. Use a scrap panel to test before the main run. Clean tools between jobs to avoid old glue build-up. With the right heat, pressure, and clean surfaces, banding should bond perfectly.
6. Maintenance and Safety Tips
To keep your edge banding operations running smoothly, routine maintenance and safety are essential.
-
Regular Cleaning: Edge banding machines generate sawdust and glue residue. Clean them daily: unplug power, remove covers, and vacuum or blow out dust from the feed path, rollers and glue pot. Wipe down surfaces with a mild cleaner. On manual jobs, keep irons and rollers free of charred adhesive. Clean glue nozzles and tips regularly to prevent clogs. Removing debris prevents jams and uneven gluing.
-
Lubrication: Machines have gears, bearings and chains that need occasional oiling. Follow the manufacturer’s schedule. Apply lubricant to feed rollers, conveyor chains, and pressure rollers to reduce wear. Proper lubrication prolongs equipment life and ensures smooth operation.
-
Glue Tank Care: If your machine has a glue pot, maintain it carefully. When not in use, lower the glue tank temperature to around 150 °C to prevent glue from overheating and carbonizing.
-
Equipment Inspection: Check blades, rollers and brushes for wear. Dull knives or hardened accumulation can scuff banding or pull it loose. Inspect electrical connections and safety guards too. Fix any loose parts or damaged cables immediately. A well-maintained machine cuts downtime and ensures quality work.
-
Safety Gear: Hot adhesives and machinery pose hazards. Always wear safety glasses and heat-resistant gloves when handling hot tools or fresh glue. Ensure guards on moving parts are in place. If using solvent-based cleaners (for PUR glue), use them in a ventilated area with proper PPE. Turn off and lock out power before any maintenance. These precautions keep your shop safe and accident-free.
Regular upkeep saves money and headaches. A clean, oiled machine performs flawlessly, and you avoid problems like motor strain or misfeeds.
7. Key Factory To Hot Melt Edge Banding Machine
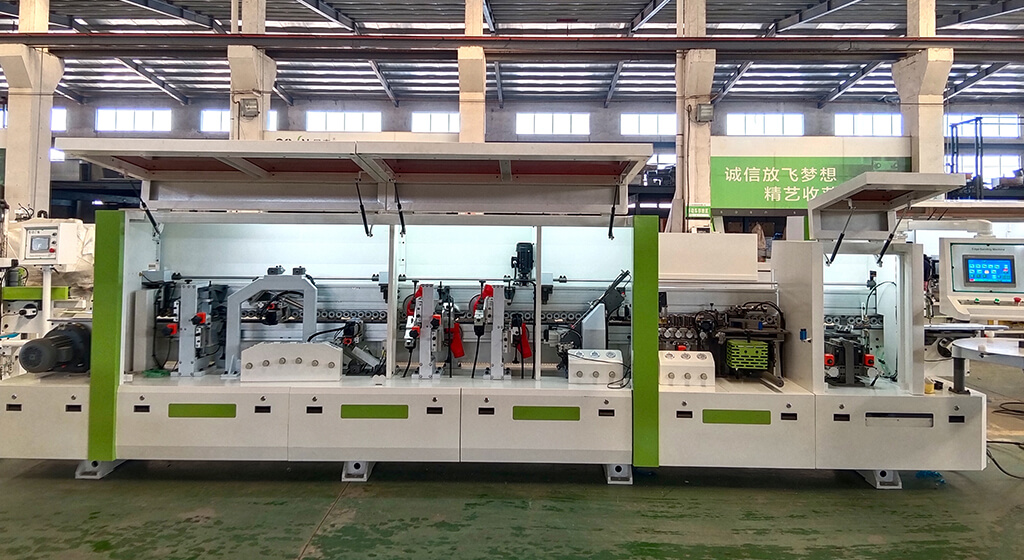
A Hot Melt Edge Banding Machine is a complex system of synchronized parts. Understanding its key components helps operators troubleshoot and make the most of it:
-
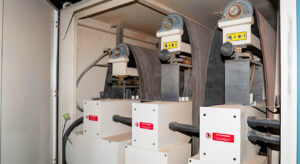
Glue Pot (Melter): The heated tank where solid glue sticks or granules are melted. The glue pot maintains a precise temperature to keep the hot-melt adhesive at the right viscosity.
-
Feed System: Roller conveyors or chain systems that move the panel steadily through the machine. Good feed rollers ensure the board is guided straight and at a constant speed.
-
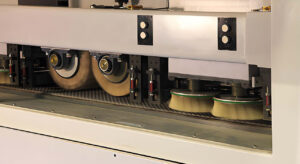
Pressure Rollers: After the glue and band meet, rubberized rollers press the band onto the panel, ensuring full contact and even bonding.

-
Trimming Units: High-speed cutters trim any excess tape. There are usually top and bottom trim heads to flush off extra material, plus an end trimmer for the ends of panels.
-
End Trimmer: A separate cutter that squares the edges by cutting the front and back ends of the band flush with the panel end.

- Scraper Units: Metal blades that scrape off dried glue strands or small imperfections after trimming, leaving a clean edge.
-
Buffing/Polishing Unit: A rotating brush or wheel that polishes the newly banded edge to a smooth shine.
-
Control System: Digital interface (often touchscreen) that sets temperatures, feed speed, and trim positions. Advanced controls allow programming for different materials and panel sizes.
-
Glue Applicator (Roller): Transports hot glue from the pot onto the band or panel. It’s adjustable for the right glue thickness.
-
Optional Attachments: Many machines offer extras like corner rounding units, milling/premilling heads (to smooth rough veneer edges), or laser glue applicators for precision.
In summary, an edgebander combines mechanical parts (glue pot, rollers, cutters) with consumable materials (glue and tapes).
7. Choosing the Right Edge Banding Machine

Selecting the proper edge banding machine is key to efficiency and quality. Machines range from simple manual units to fully automatic lines. Here’s how to choose the best fit for your shop:
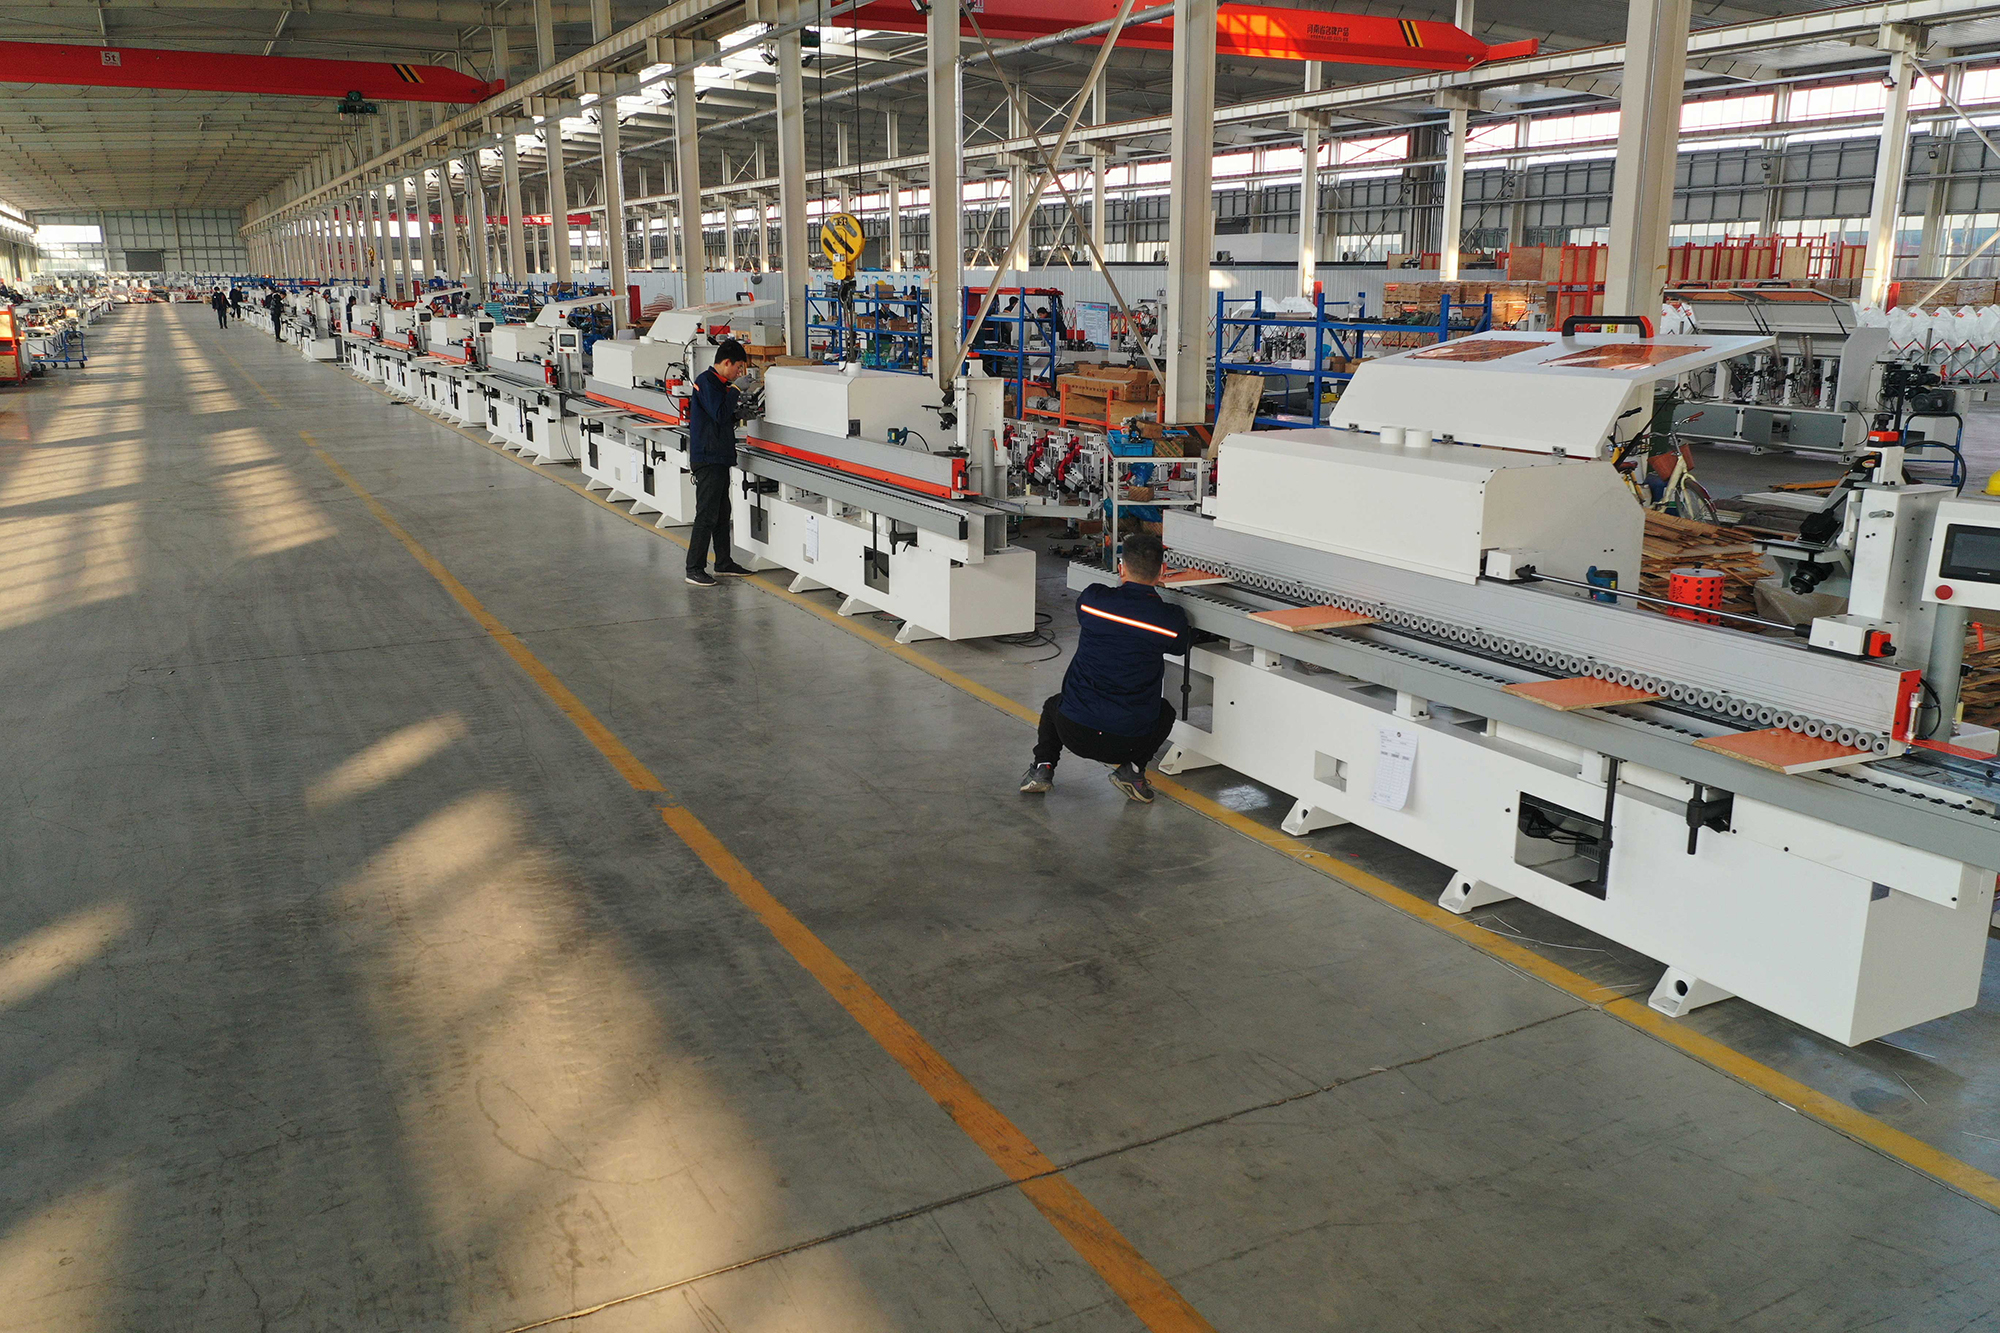
Modern edge banding machines automate the process, feeding, gluing, pressing and trimming in one pass. For high-volume shops, automatic banders from brands like Bestin offer features like pre-milling (for a flat edge), PUR-compatible glue units, corner rounding and end trimming. These machines require investment but yield precise, repeatable results on large production runs.
-
Volume and Size: If you produce many panels daily, an automatic machine saves time. Larger machines can handle oversized panels and thicker banding. For smaller shops or one-off jobs, a Manual Edge Banding Machine may suffice. Manual banding stations or handheld irons are fine for occasional use. Estimate your typical job size and choose accordingly.
-
Glue Compatibility: Ensure the machine supports the adhesive type you plan to use. EVA-only machines may not handle PUR without modifications. Many modern machines can switch between EVA and PUR.
-
Features: Higher-end banders include extras like end trimming saws, radius scrapers, corner rounders, and buffing units for a flawless finish. These save manual labor later. If precise miters or plumbing fits are needed, features like 90° trimming are invaluable. Evaluate which add-ons justify the cost for your product mix.
-
Ease of Use: Look for intuitive controls and quick setup. A machine that’s too complex can slow you down. Some newer banders have touch screens, preset programs, and easy adjustment for different panel thicknesses.
No matter the choice, all edge banding machines share the same goal: to bind banding tightly with even pressure and controlled heat.
8. To Sum Up
Ready to take your edge banding to the next level? With the right hot melt edge banding process and equipment, you’ll produce furniture and panels that look stunning and stand the test of time.
Discover our edge banding machines: From compact banders to high-speed automatics, find the perfect machine to boost your productivity.
Let us help you achieve flawlessly finished edges and durable bonds that impress your customers. Together, we’ll make your woodworking projects shine!