Edge Banding is an essential finishing process in woodworking that not only conceals raw plywood edges but also enhances durability and aesthetics.
When it comes to curved plywood applications, achieving a flawless finish can be particularly challenging.
This article provides an in-depth exploration of edge banding for curved plywood, detailing techniques, tools, and tips to help you master the process.
We will also introduce our state-of-the-art curved edge banding machine from Bestin Group—a game-changer for professionals and DIY enthusiasts alike.
Featured Resource
Table of Contents
1. Introduction
Edge Banding is the process of applying a thin strip of material—often a veneer, plastic, or melamine—to the exposed edges of materials like plywood, particle board, or MDF.
This process transforms a utilitarian panel into a product that appears as if it were made entirely of solid wood, providing a seamless and high-quality finish.
Historically, edge banding was performed manually with simple carpentry tool.
Today, however, the process has evolved, with automated edge banders and specialized equipment making it faster, more precise, and accessible even for complex curves.

2. Why Edge Banding For Curved Plywood Is Essential

Edge Banding serves several critical functions in woodworking, especially when dealing with curved plywood:
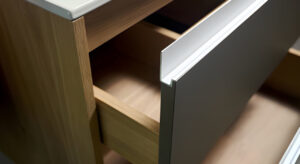
- Aesthetic Enhancement: It hides the raw, layered look of plywood edges and gives the impression of a continuous, solid piece of wood.
- Increased Durability: By protecting the plywood edges from moisture, impacts, and wear, edge banding extends the life of your project.
- Professional Finish: High-quality edge banding lends an air of professionalism to your work, making it look refined and well-crafted.
- Value Addition: Projects with meticulous finishing techniques can command a higher market value and customer satisfaction.
When working with curves, the importance of a consistent, well-bonded edge band increases.
The curves can expose more vulnerable areas of the plywood, making a strong and durable edge band crucial.
3. Challenges of Curved Plywood Edge Banding
Unlike straight-edged panels, curved plywood presents unique challenges that demand specialized approaches:
- Non-Uniform Surfaces: Curved surfaces often have varying radii, making it difficult to achieve uniform pressure and adhesion during the banding process.
- Tool Limitations: Traditional edge banding tools such as household irons or standard edge trimmers may not adequately conform to curved surfaces.
- Adhesive Activation: Ensuring that the heat-activated adhesive bonds evenly across a curved edge requires careful temperature control and technique.
- Material Flexibility: Not all edge banding materials are designed to flex; selecting a product with the right degree of pliability is crucial.
These challenges necessitate a combination of refined techniques and innovative tools, such as our advanced curved edge banding machine.
4. Techniques for Edge Banding for Curved Plywood
4.1. Heat Application Methods
Heat is essential to activate the adhesive on pre-glued edge banding materials. Two popular methods include:
-
Iron-On Method:
A household iron can be used on small sections of curved edges. While effective on flatter areas, the iron’s flat surface can make it difficult to evenly cover tight curves. Users must work slowly, applying heat in short, manageable sections. -
Heat Gun:
A heat gun offers more precision for curved surfaces. Its adjustable temperature settings and concentrated heat flow allow you to carefully control the adhesive activation process. Move the heat gun steadily over the curved edge, ensuring even distribution without overheating the material.
4.2. Manual Application and Clamping
For curves that are too intricate for heat-only methods, manual application with adhesives and clamps can be effective:
-
Pre-Application Glue:
Apply a high-quality wood glue, such as Titebond II, directly to the plywood edge. Secure the edge banding using masking tape or custom clamps, and allow the glue to cure overnight. This method can be particularly useful when working on highly contoured surfaces. -
Rollers and Pressure Tools:
Use a small roller or pressure block to press the banding firmly against the curved edge immediately after applying heat. This step ensures a strong bond and minimizes the risk of the banding lifting or wrinkling.
4.3. Using Specialized Machine and Jigs
Custom machine and jigs can greatly improve the efficiency and quality of edge banding on curved surfaces:
-
Custom Jigs:
Create or purchase a jig designed to hold curved panels securely. A well-designed jig ensures that the edge banding is applied evenly along the curve and helps maintain consistent pressure throughout the process. -
Edge Trimmers:
Invest in a high-quality edge trimmer specifically designed for curved surfaces. These tools can make precise cuts and trim excess material without damaging the finish. -
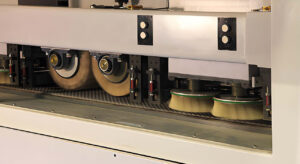
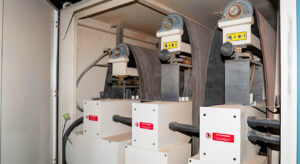
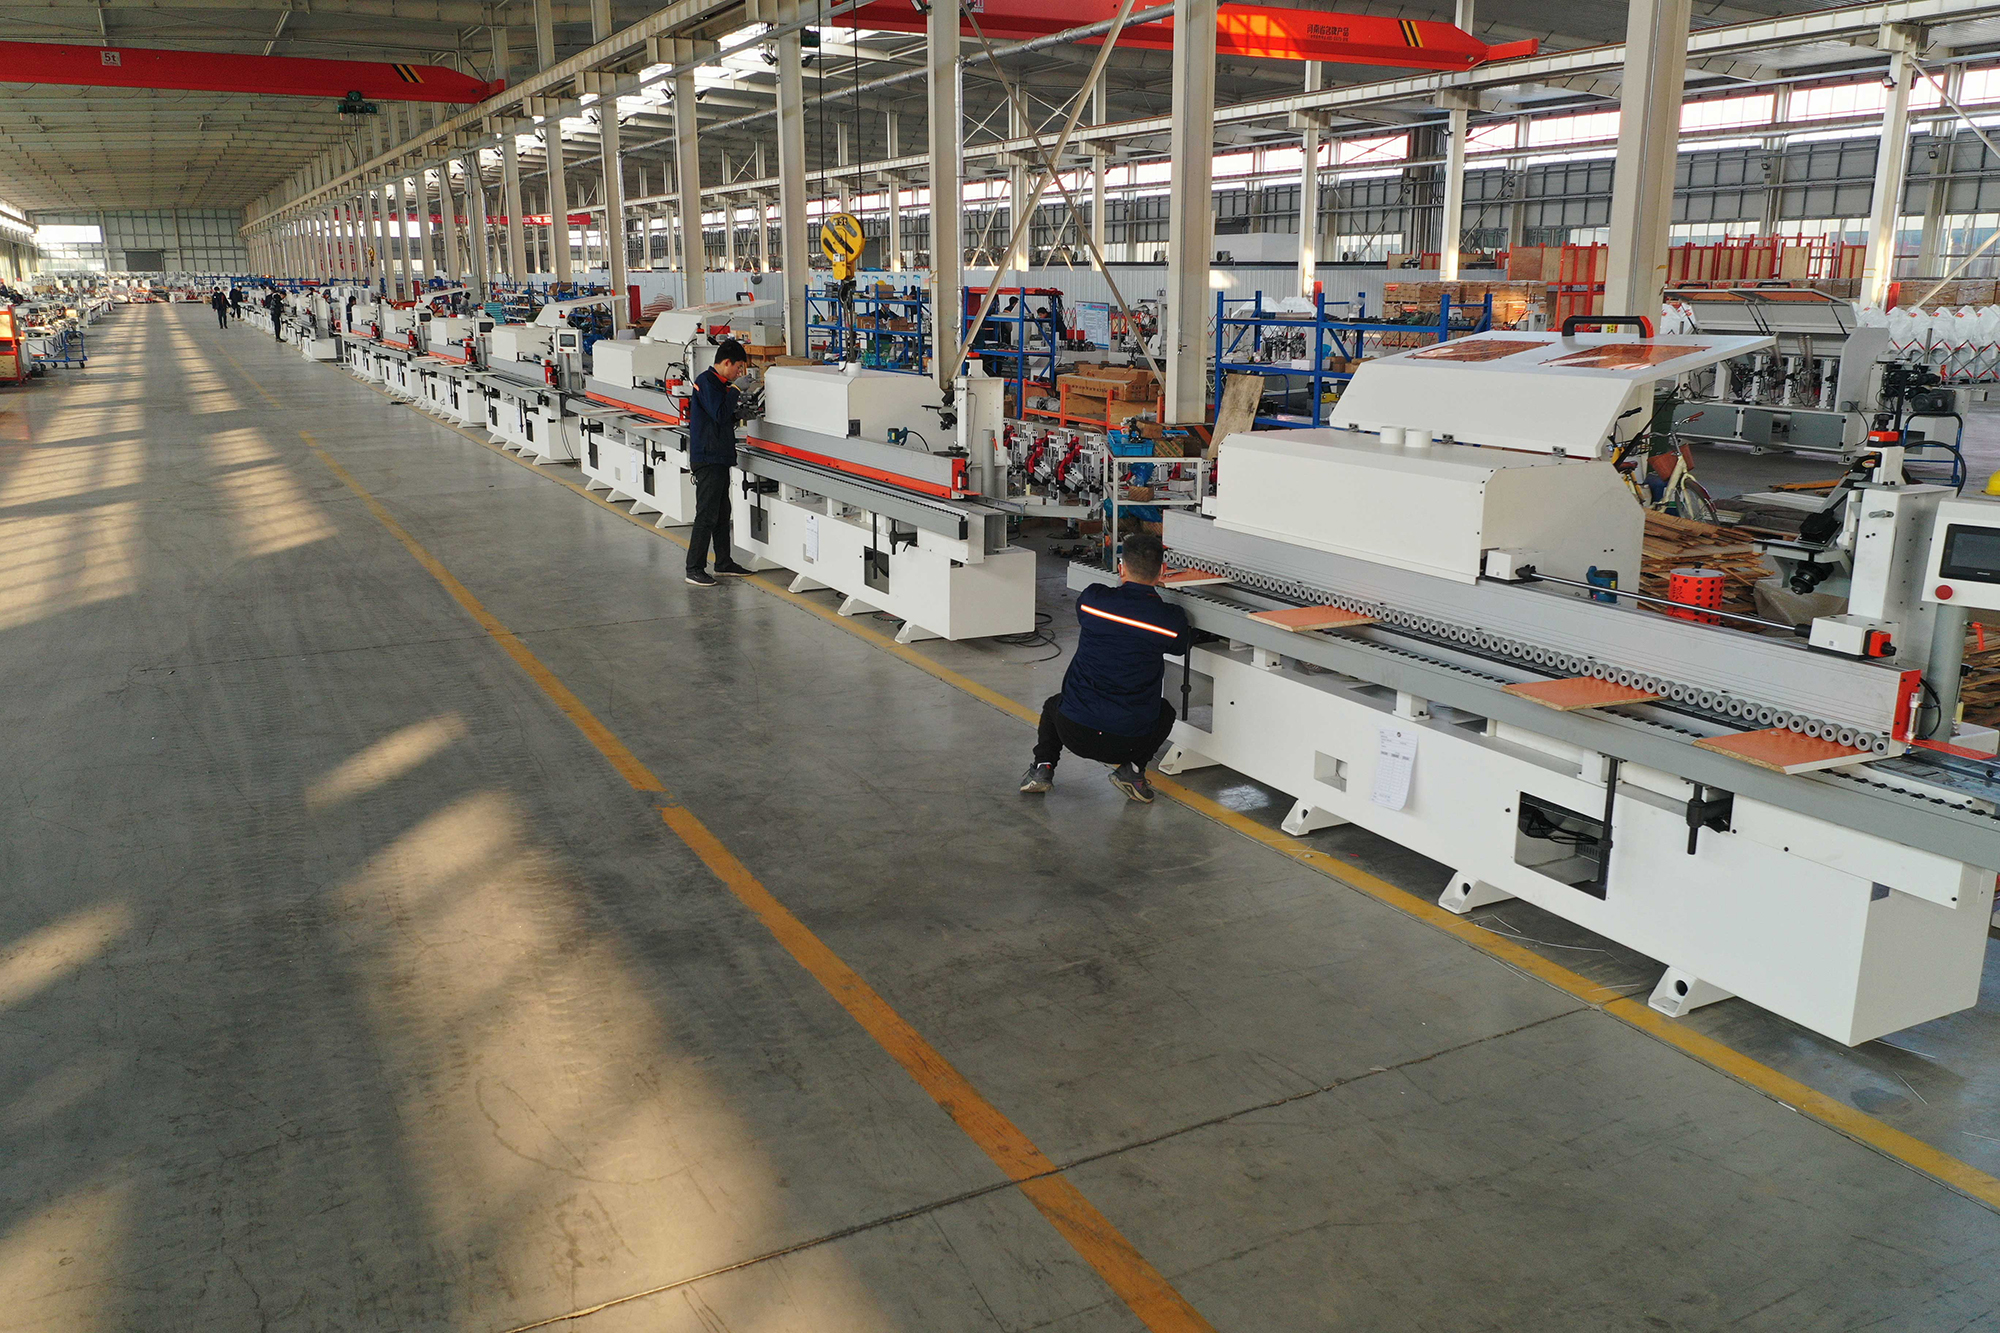
Our Curved Edge Bander:
At Bestin Group, we have developed a curved edge banding machine that revolutionizes this process. Our machine is engineered to conform to both internal and external curves, delivering consistent pressure and heat application for a flawless finish every time.

Machine Working Video
5. Step-by-Step Process for Edge Banding Curved Plywood
In this section, we outline a detailed, step-by-step process to achieve a flawless edge band on curved plywood. By following these steps, you can ensure a high-quality finish every time.
Step 1: Preparation
-
Material Selection:
Choose high-quality plywood and edge banding material that matches your project’s aesthetic. Ensure the banding is flexible enough to accommodate curves without cracking. -
Surface Cleaning:
Clean the plywood edges thoroughly. Remove dust, grease, and any imperfections that may interfere with adhesion.
-
Tool Setup:
Gather all necessary tools including your heat gun or iron, edge trimmer, clamps, and sandpaper. If you’re using our advanced curved edge banding machine, ensure it is properly calibrated.
Step 2: Adhesive Activation
-
Heat Application:
Using your heat gun or iron, apply heat evenly to a small section of the edge banding adhesive. If using a heat gun, maintain a steady distance of about 3-4 inches from the surface. For iron-on applications, work slowly to ensure the adhesive is properly activated.
-
Manual Method Alternative:
For extremely tight curves, you may opt for a manual adhesive application using a high-quality wood glue. Apply the glue evenly and secure the banding with masking tape.
Step 3: Application of Edge Banding
Aligning the Banding:
Carefully position the activated edge banding along the curved plywood edge. Use a small roller to press the banding firmly, ensuring full contact with the surface.
-
Using the Curved Edge Bander:
For optimal results, feed the plywood into our curved edge banding machine. The machine will automatically adjust to the curve, apply consistent heat and pressure, and bond the banding securely.
Step 4: Trimming Excess Material
Manual Trimming:
If you’re working manually, use an edge trimmer or a sharp utility knife to trim off any excess banding. Make sure to keep the cutter aligned with the edge for a neat finish.-
Machine Trimming:
Our curved edge banding machine includes an integrated trimming system that automatically removes excess material, ensuring a precise and clean edge.
Step 5: Finishing Touches
Sanding:
Lightly sand the trimmed edges with 120-220 grit sandpaper to smooth out any rough spots. This step is crucial for preparing the surface for final finishing.-
Final Heat Pass:
Run the heat source over the edge one more time to secure the adhesive and ensure that the banding adheres completely. This final step can significantly enhance the durability of the bond. -
Inspection:
Inspect the finished edge for uniformity and smoothness. Any areas that appear uneven may require additional sanding or a touch-up with the heat source.
Step 6: Final Finishing
Priming and Painting:
Once the edge banding is securely in place, you can proceed with priming and painting or staining the entire project. The finished edge should seamlessly blend with the overall appearance of your work.-
Sealing:
Apply a clear coat or sealant to protect the edge banding from moisture, impacts, and wear. This step is especially important for items that will be subject to heavy use.
6. Best Practices and Expert Tips
To achieve a flawless finish on your curved plywood projects, keep these expert tips in mind:
6.1. Work in Small Sections
6.2. Temperature Control
6.3. Practice Makes Perfect
6.4. Invest in Quality Materials
6.5. Use the Right Tools or Machine
7. Troubleshooting Common Problems
Even with careful preparation, you might encounter some challenges during the edge banding process. Here are some common issues and how to address them:
Issue 1: Uneven Adhesion
Symptoms:
-
Portions of the banding are not properly bonded.
-
Visible gaps or bubbles along the edge.
Solutions:
-
Reapply Heat: If using a heat gun or iron, ensure that the adhesive is evenly melted by passing over the area multiple times.
-
Increase Pressure: Use a roller or clamp to apply additional pressure immediately after heat application.
-
Check Material Compatibility: Make sure that the edge banding material is designed for flexibility and is compatible with the adhesive used.
Issue 2: Excess Material and Rough Edges
Symptoms:
-
Excess banding material remains after trimming.
-
Rough or jagged edges after trimming.
Solutions:
-
Use an Integrated Trimmer: Our curved edge banding machine’s built-in trimming system minimizes this problem.
-
Manual Refinement: If working manually, take your time to carefully trim the edge with a quality edge trimmer or utility knife. Sand lightly afterwards to smooth the finish.
-
Multiple Trimming Passes: Sometimes a second trimming pass is necessary to remove all excess material.
Issue 3: Adhesive Not Activating Properly
Symptoms:
-
The banding fails to bond securely.
-
The edge banding lifts or peels off after application.
Solutions:
-
Temperature Check: Ensure that the adhesive is being heated to the correct temperature. Too little heat will not activate the glue, while too much can damage the veneer.
-
Uniform Application: Work in smaller sections to ensure that each area receives adequate heat and pressure.
-
Adhesive Quality: Consider switching to a higher-quality adhesive if you continue to face bonding issues.
8. Conclusion
Edge Banding for curved plywood is both an art and a science.
Whether you’re a seasoned professional or a passionate DIYer, understanding the challenges and mastering the techniques of edge banding is crucial to achieving a flawless finish.
In this comprehensive guide, we’ve covered everything from the basic concepts and benefits of edge banding to advanced techniques and troubleshooting.
We’ve also introduced our revolutionary curved edge banding machine—designed to streamline the process, enhance consistency, and deliver professional-quality results on even the most complex curves.
By incorporating our advanced equipment into your workflow, you can significantly reduce manual labor, minimize errors, and produce stunning, durable finishes that impress customers and elevate your brand.
The process may require attention to detail and a willingness to experiment, but the results are well worth the effort.
For woodworking professionals and enthusiasts looking to stay ahead in the competitive market, investing in quality machine and learning cutting-edge techniques is essential.
With the insights provided in this guide, you’re now equipped to tackle edge banding curved plywood with confidence.